CATEGORIES
- Latest News
- Interviews
- Golf Travel
- Features
- Juniors
- Competition
- Events
- Health
- Equipment
- Fashion
- Archive
INFORMATION
CURRENT ISSUE

SUBSCRIPTIONS


Getting into less trouble off the tee, better positioning on the fairways and having shorter putts, will elevate your golfing experience. In this guide, we will simplify the swing plane and club face to highlight their crucial roles in boosting accuracy with your driver and irons. Additionally, we will explore how ball position and balance play a pivotal importance in unifying your game of precision.
As a rule, the club face is the most crucial element to remember in golf. The club face always wins. It doesn’t matter if you have a driver
in your hand or an iron, this concept is universal across all clubs. You could make the most incredible golf swing, but if the club face
isn’t pointing at the target at the precise moment when the club hits the ball, the ball will always start in the direction in which the
club face is .
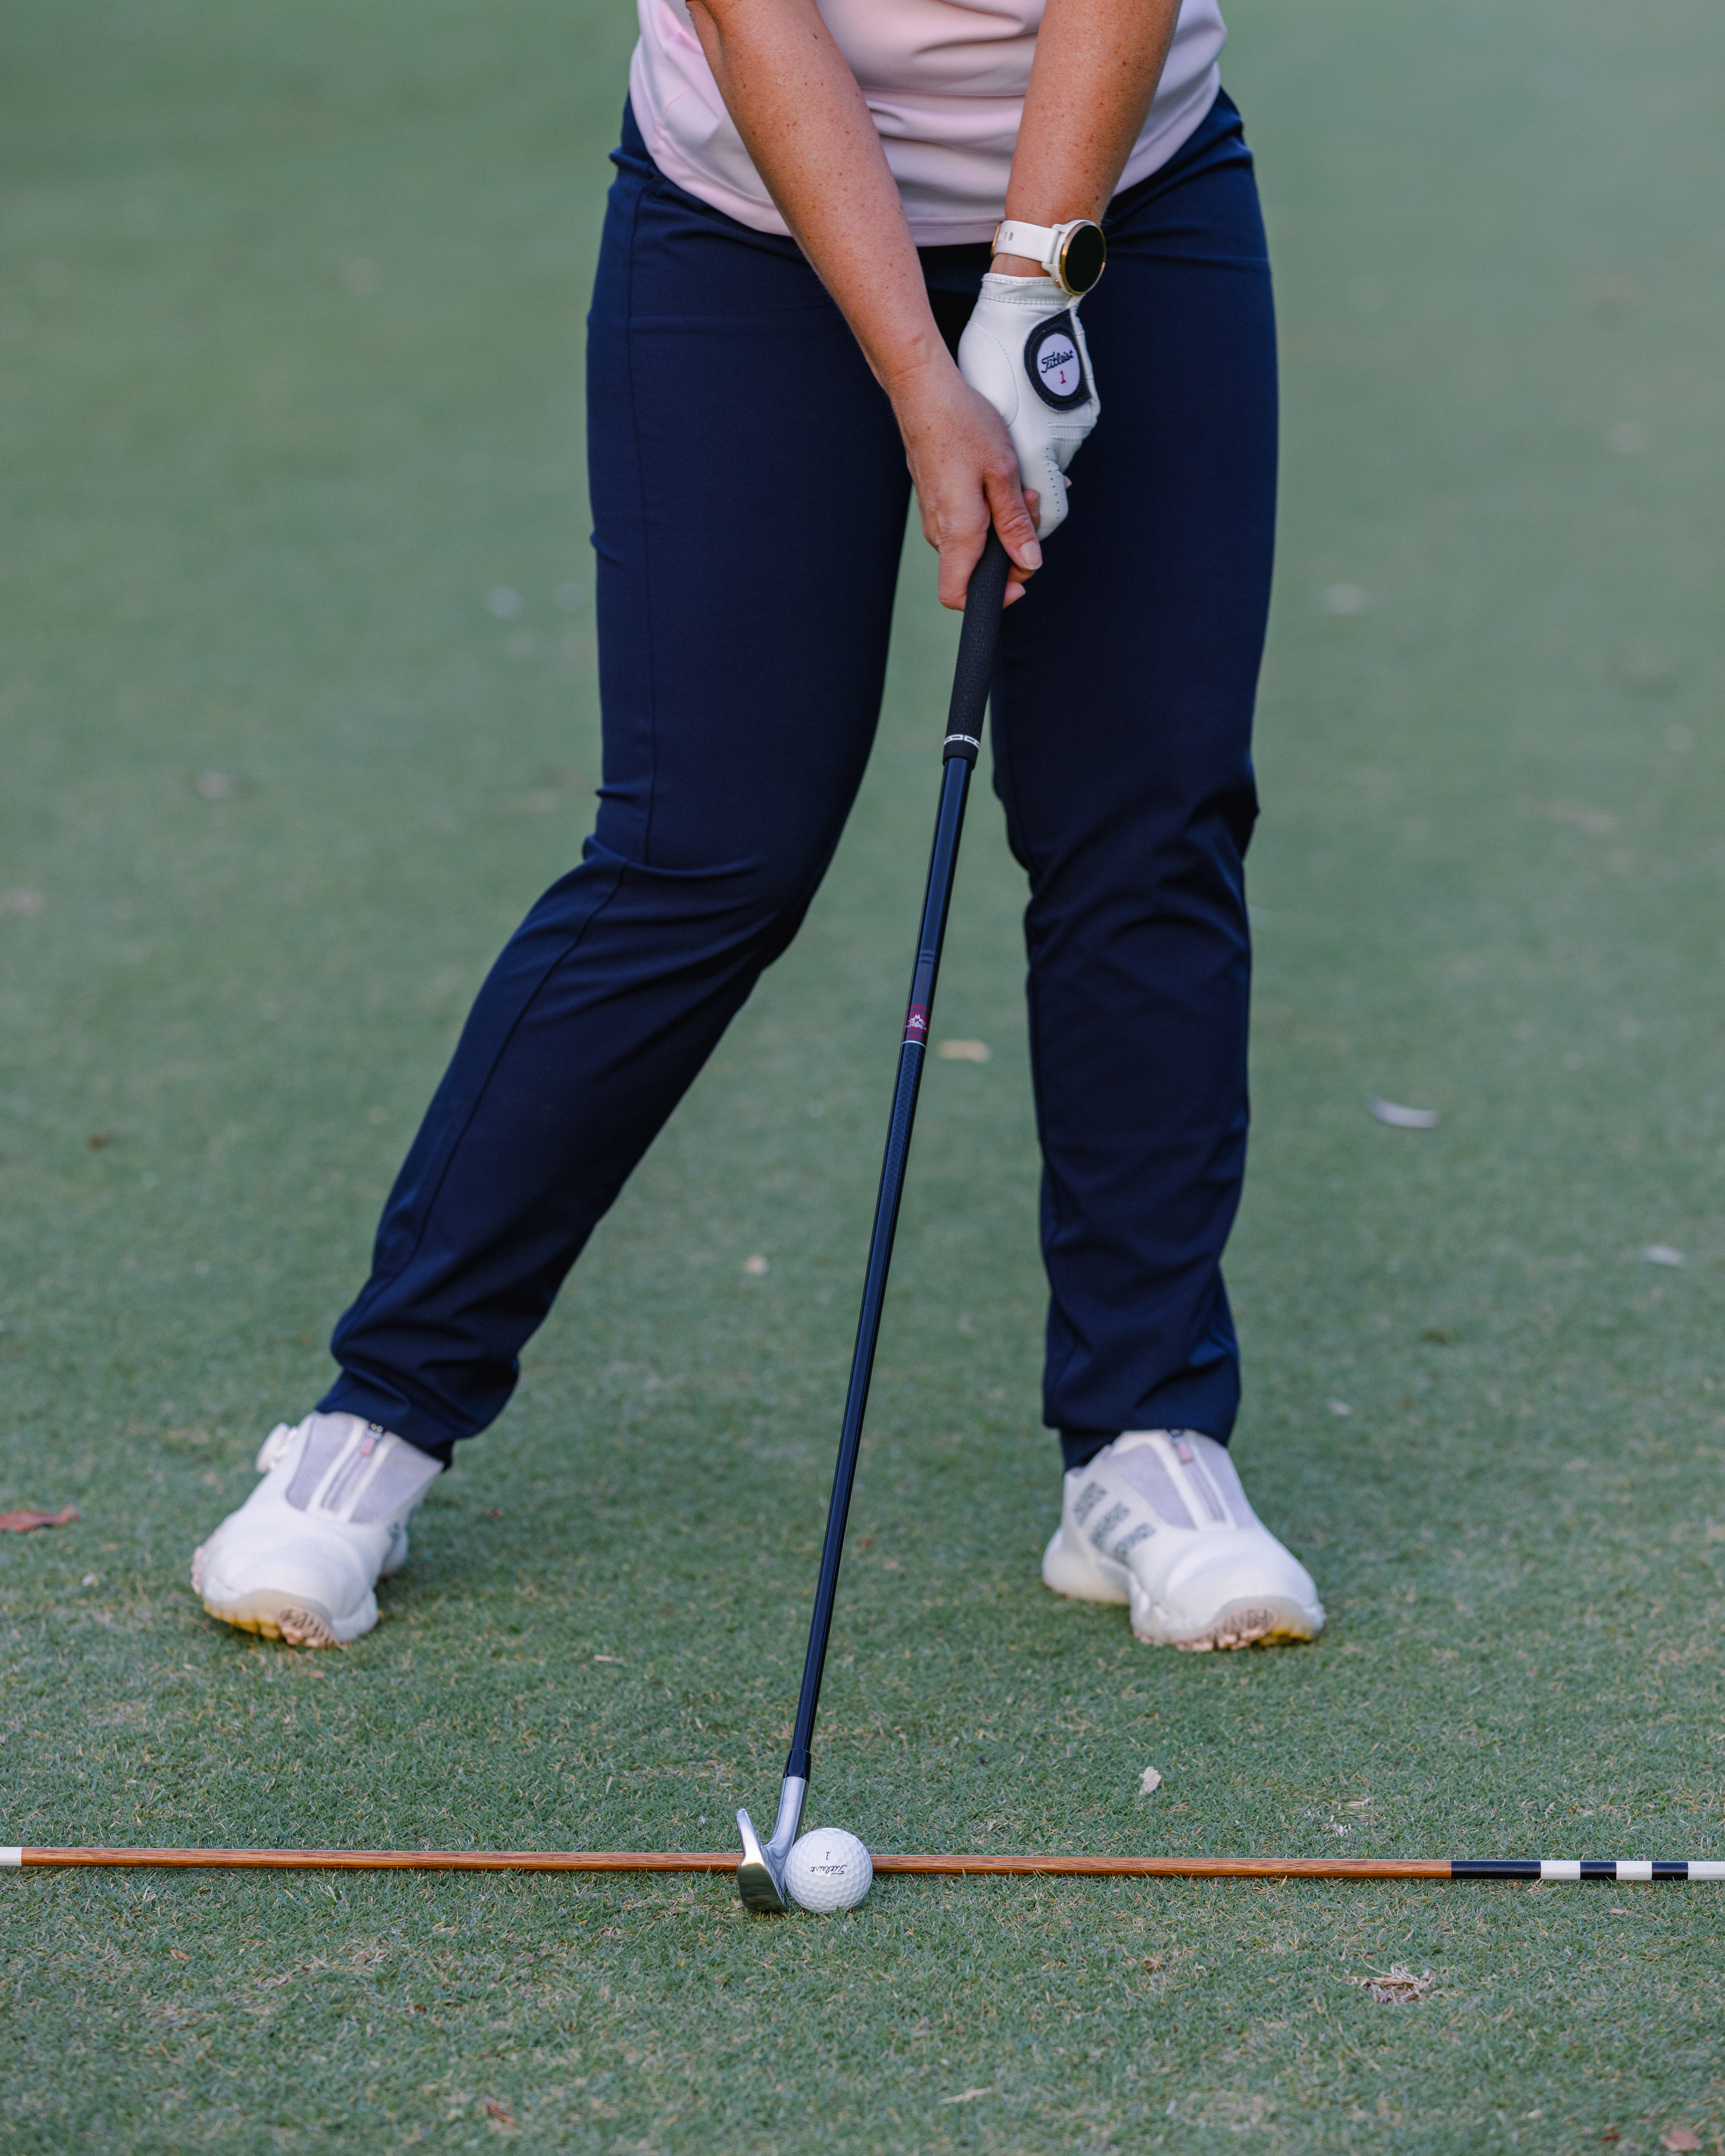
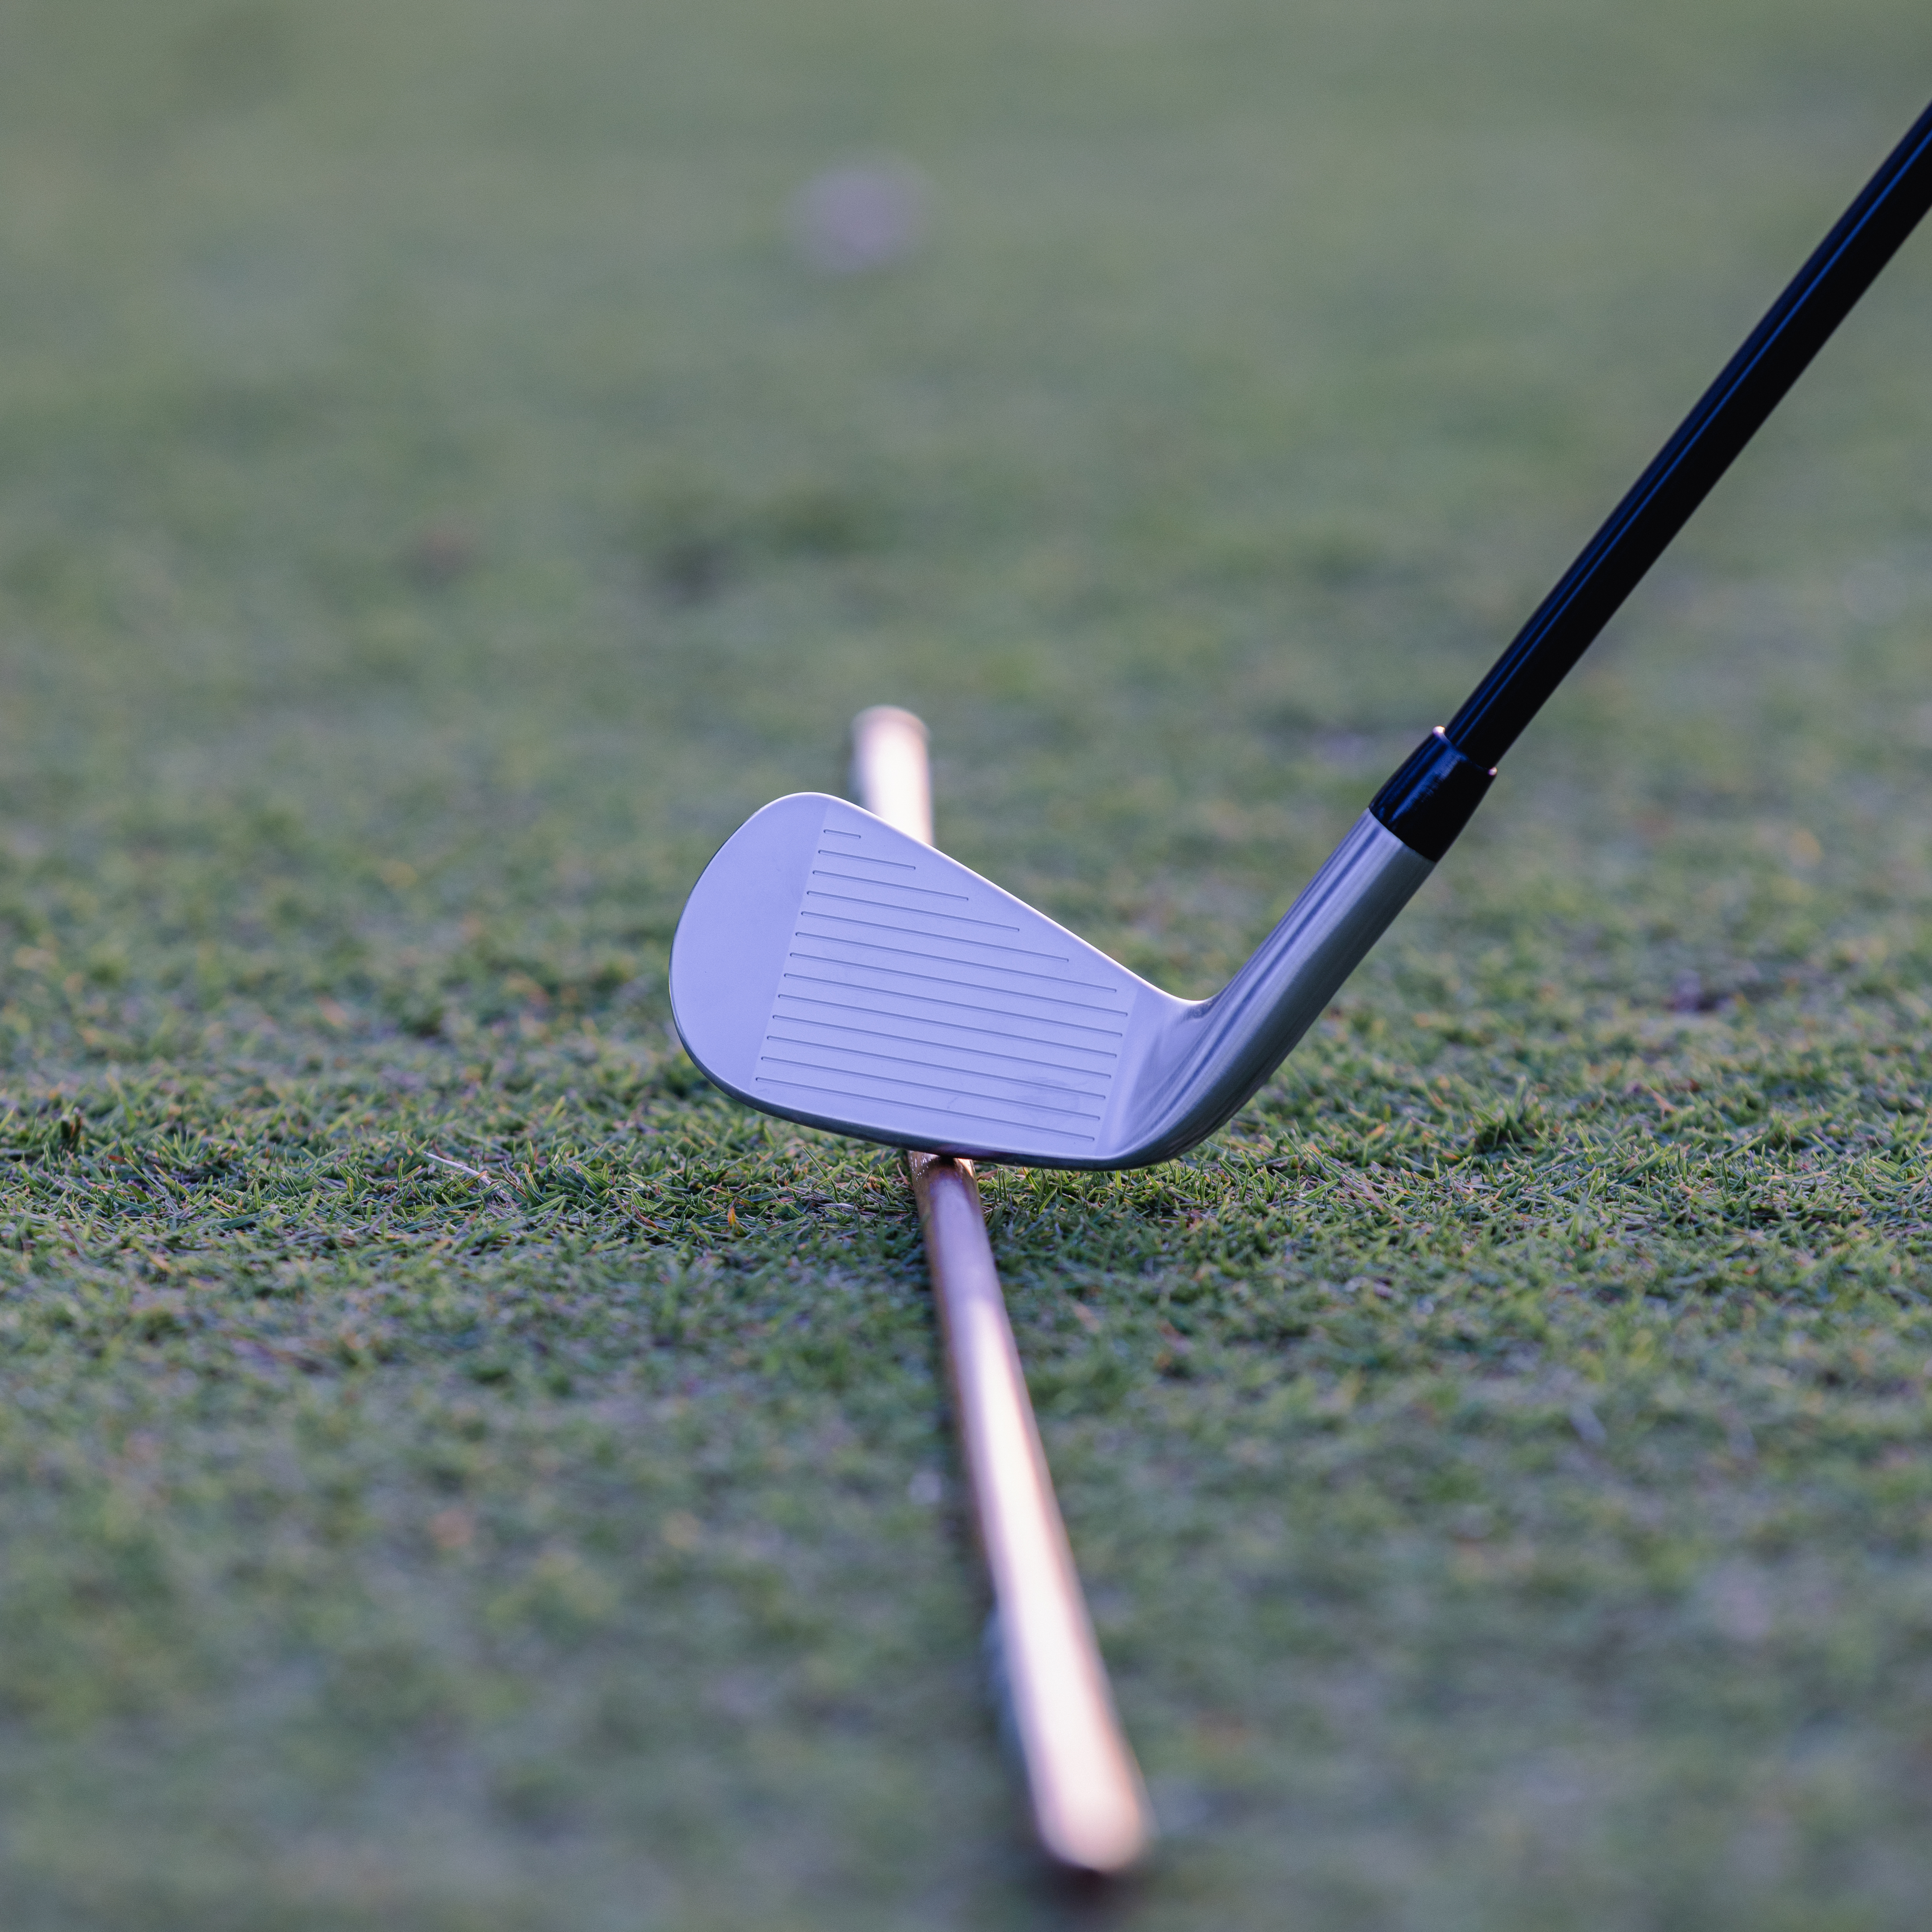
Club face pointing right, the ball goes right
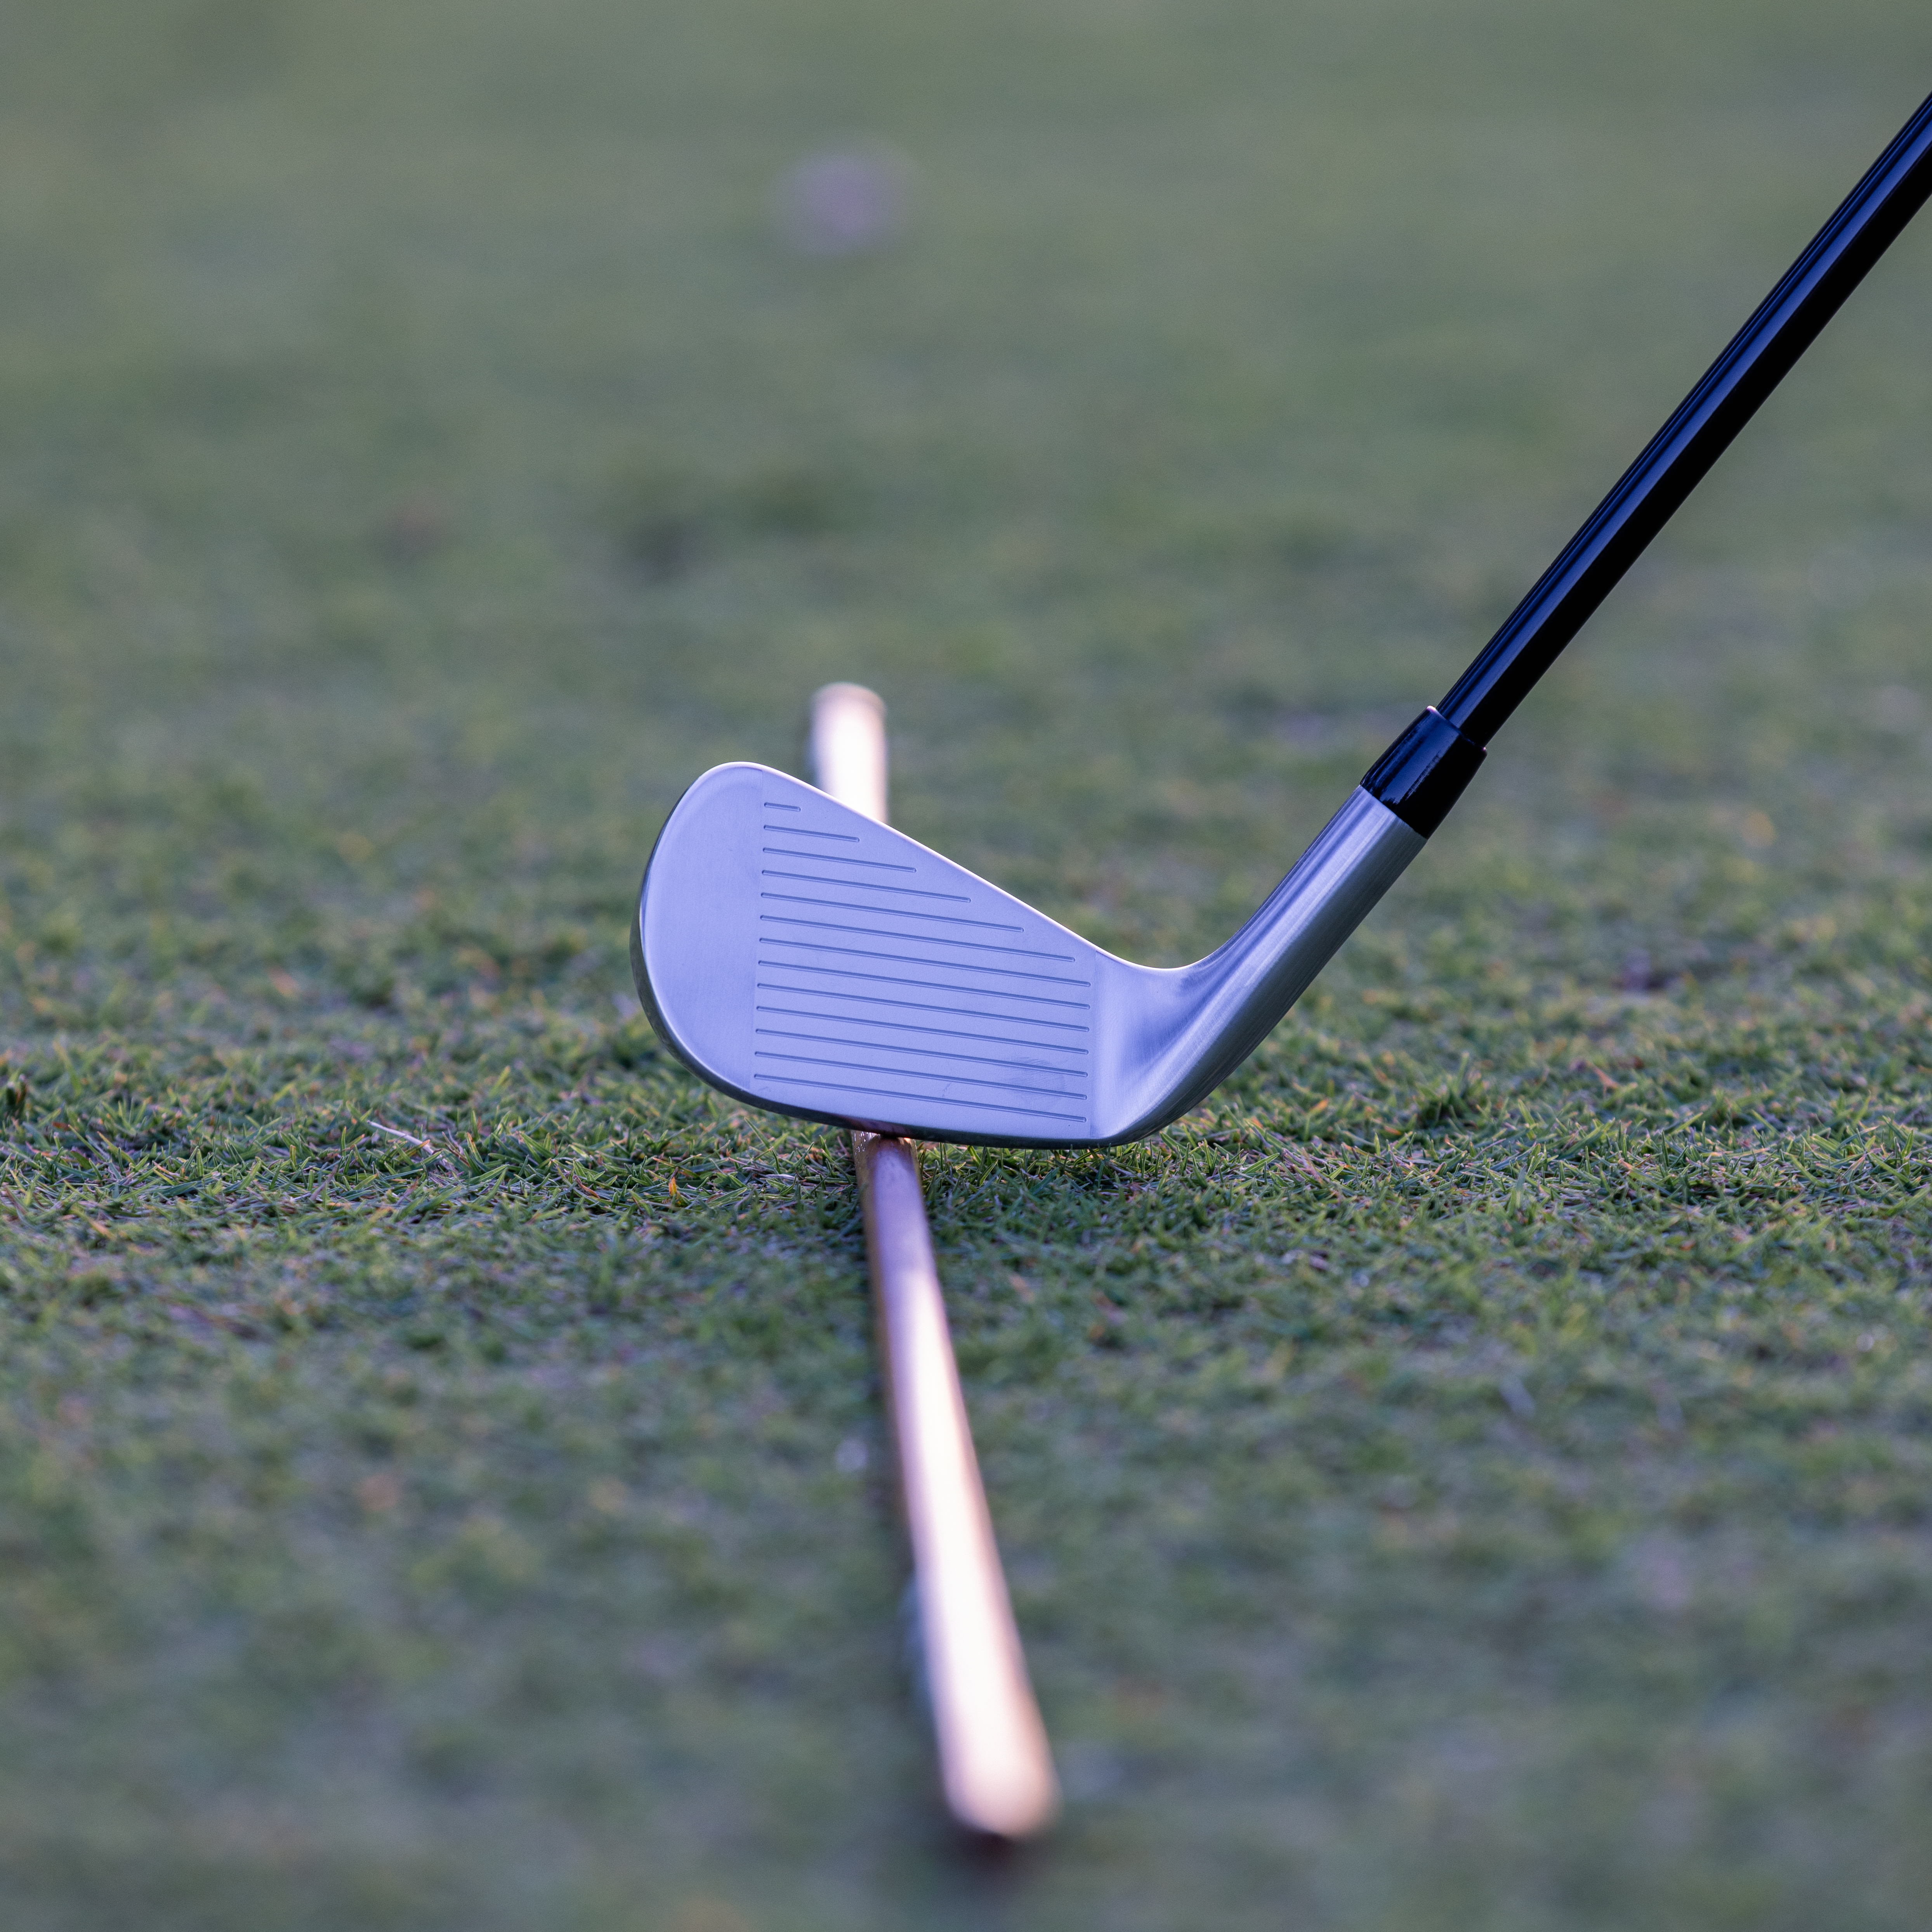
Club face pointing left, ball goes left

Club face straight, ball goes straight
The club path is the map of your club face’s journey from the start to the finish of the swing. When you swing a driver, the club path would likely look different from when you are swinging an iron due to the varying lengths of each club. But here’s the thing – while visually it might look different, the underlying strategy of how you move the club remains the same. Having the ability to manage your club path will allow you to control the amount of curve on the golf ball.

Holding a driver and holding an iron to show the club shaft sitting at different angles, representing the different club paths


When I was competing, I trained with Lawrie Montague, a PGA professional who simplified the golf swing for me and gave me the following drill which I still use every day in practise.
Elevating your golf accuracy is to harmonise the club face and club path relationship. You will notice as you go through the steps, that there’s consistently a moment when the club face references your body or aligns with a point directly in line with your target.
Begin by setting up an alignment stick or a golf club by laying it on the ground and pointing towards your target. Set up as if you’re about to swing, with the club head resting on the stick and the club face pointing directly down the alignment stick. Carefully follow each step, concentrating on aligning the club face angle while matching closely to the body’s angle when the club head reaches hip high or lower on both sides. Be attentive to your positions, gradually increasing speed until your swing returns to its usual pace. Integrate this exercise into your practise routine between shots for optimal outcomes.
FRONT
 Step
1
DOWN THE LINE
 Step
1
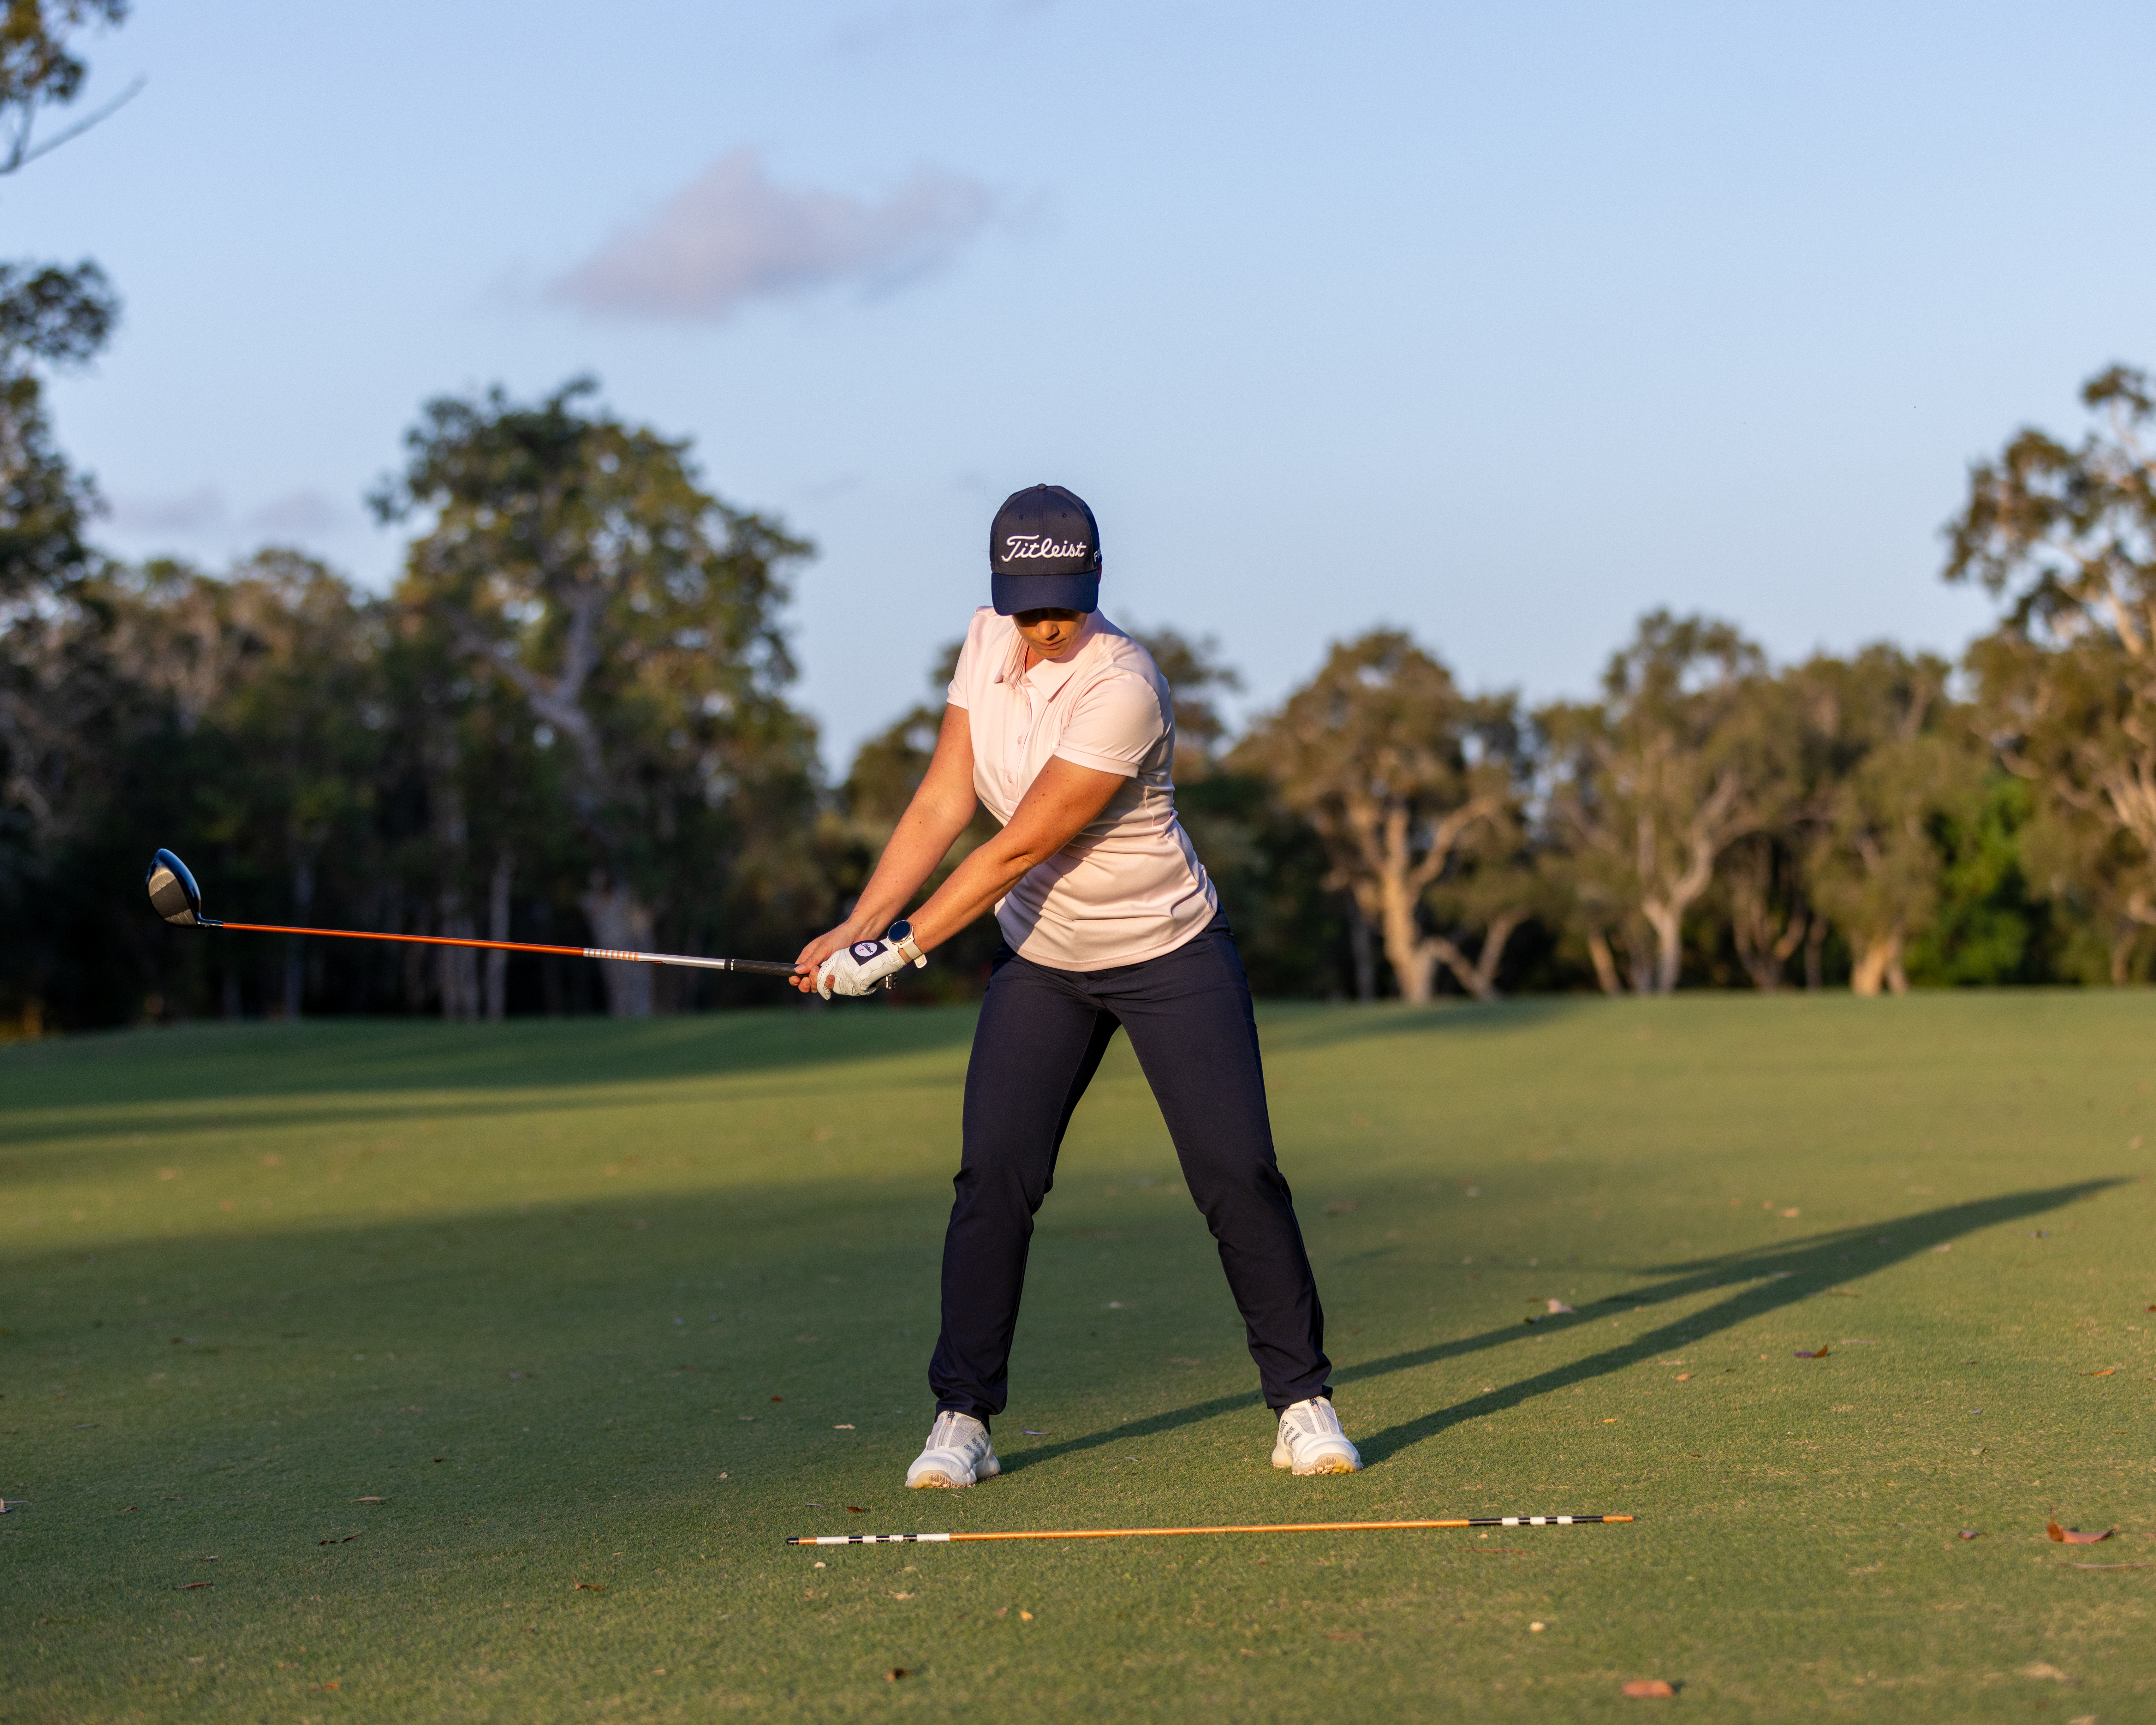
Step 2

Step 2

Step 3

Step 3

Step 4
Step 4

Step 5

Step 5

Step 6

Step 6
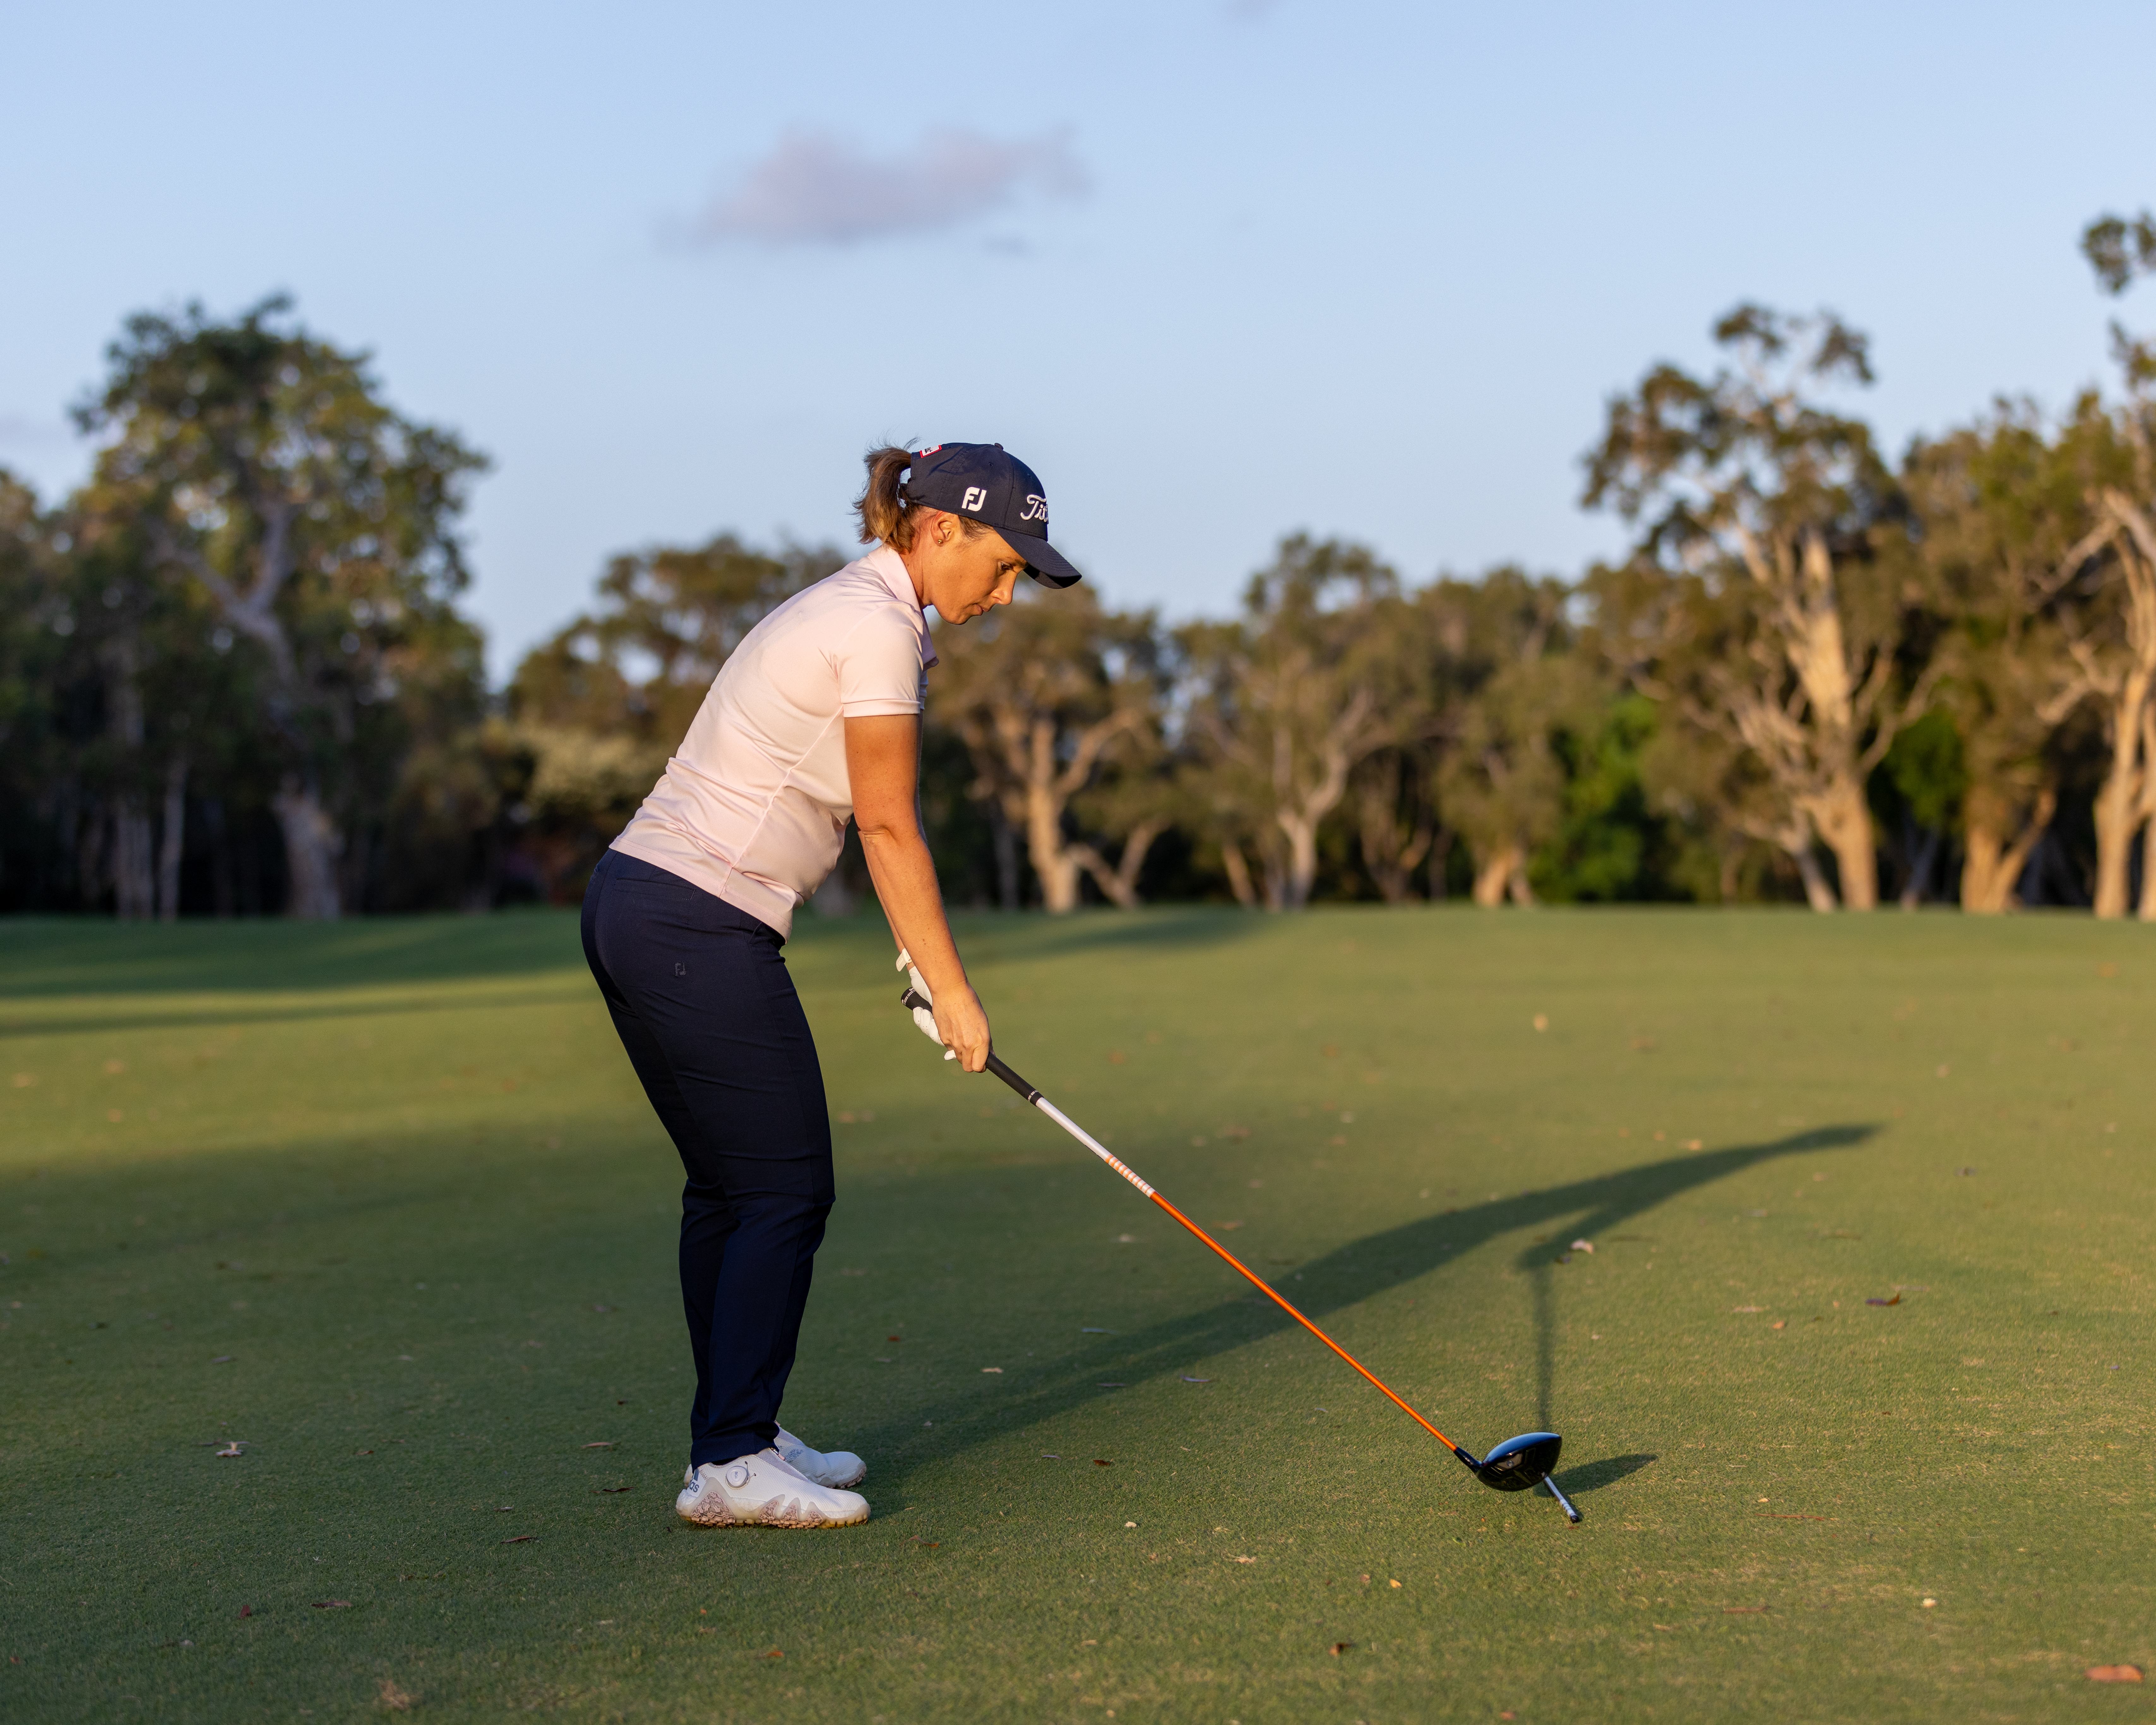
The positioning of the golf ball in your stance has a powerful impact on the direction of your shot. The reason you alter the position of your ball at your feet is due to the length and design of the club and matching these with the golf club's face angle and swing path. Envisioning the club path we created in the photos, clarifies the reasons for distinct ball placements with a driver and our irons. The swing's arc reveals that placing the ball too far back means the club face is most likely going to be open, while when positioning it too far forward the club face would be closing. Understanding this concept is pivotal for accurate golf shots.
For a driver, characterised by its large head, the sweet spot sits above the centre line of the club face. Hence, we position the ball forward in our stance and we tee the ball up to allow us to make contact with the ball, higher on the club face. This setup allows the ball to be struck on the upswing, allowing the club face ample time to square up, launching the ball high and straight.
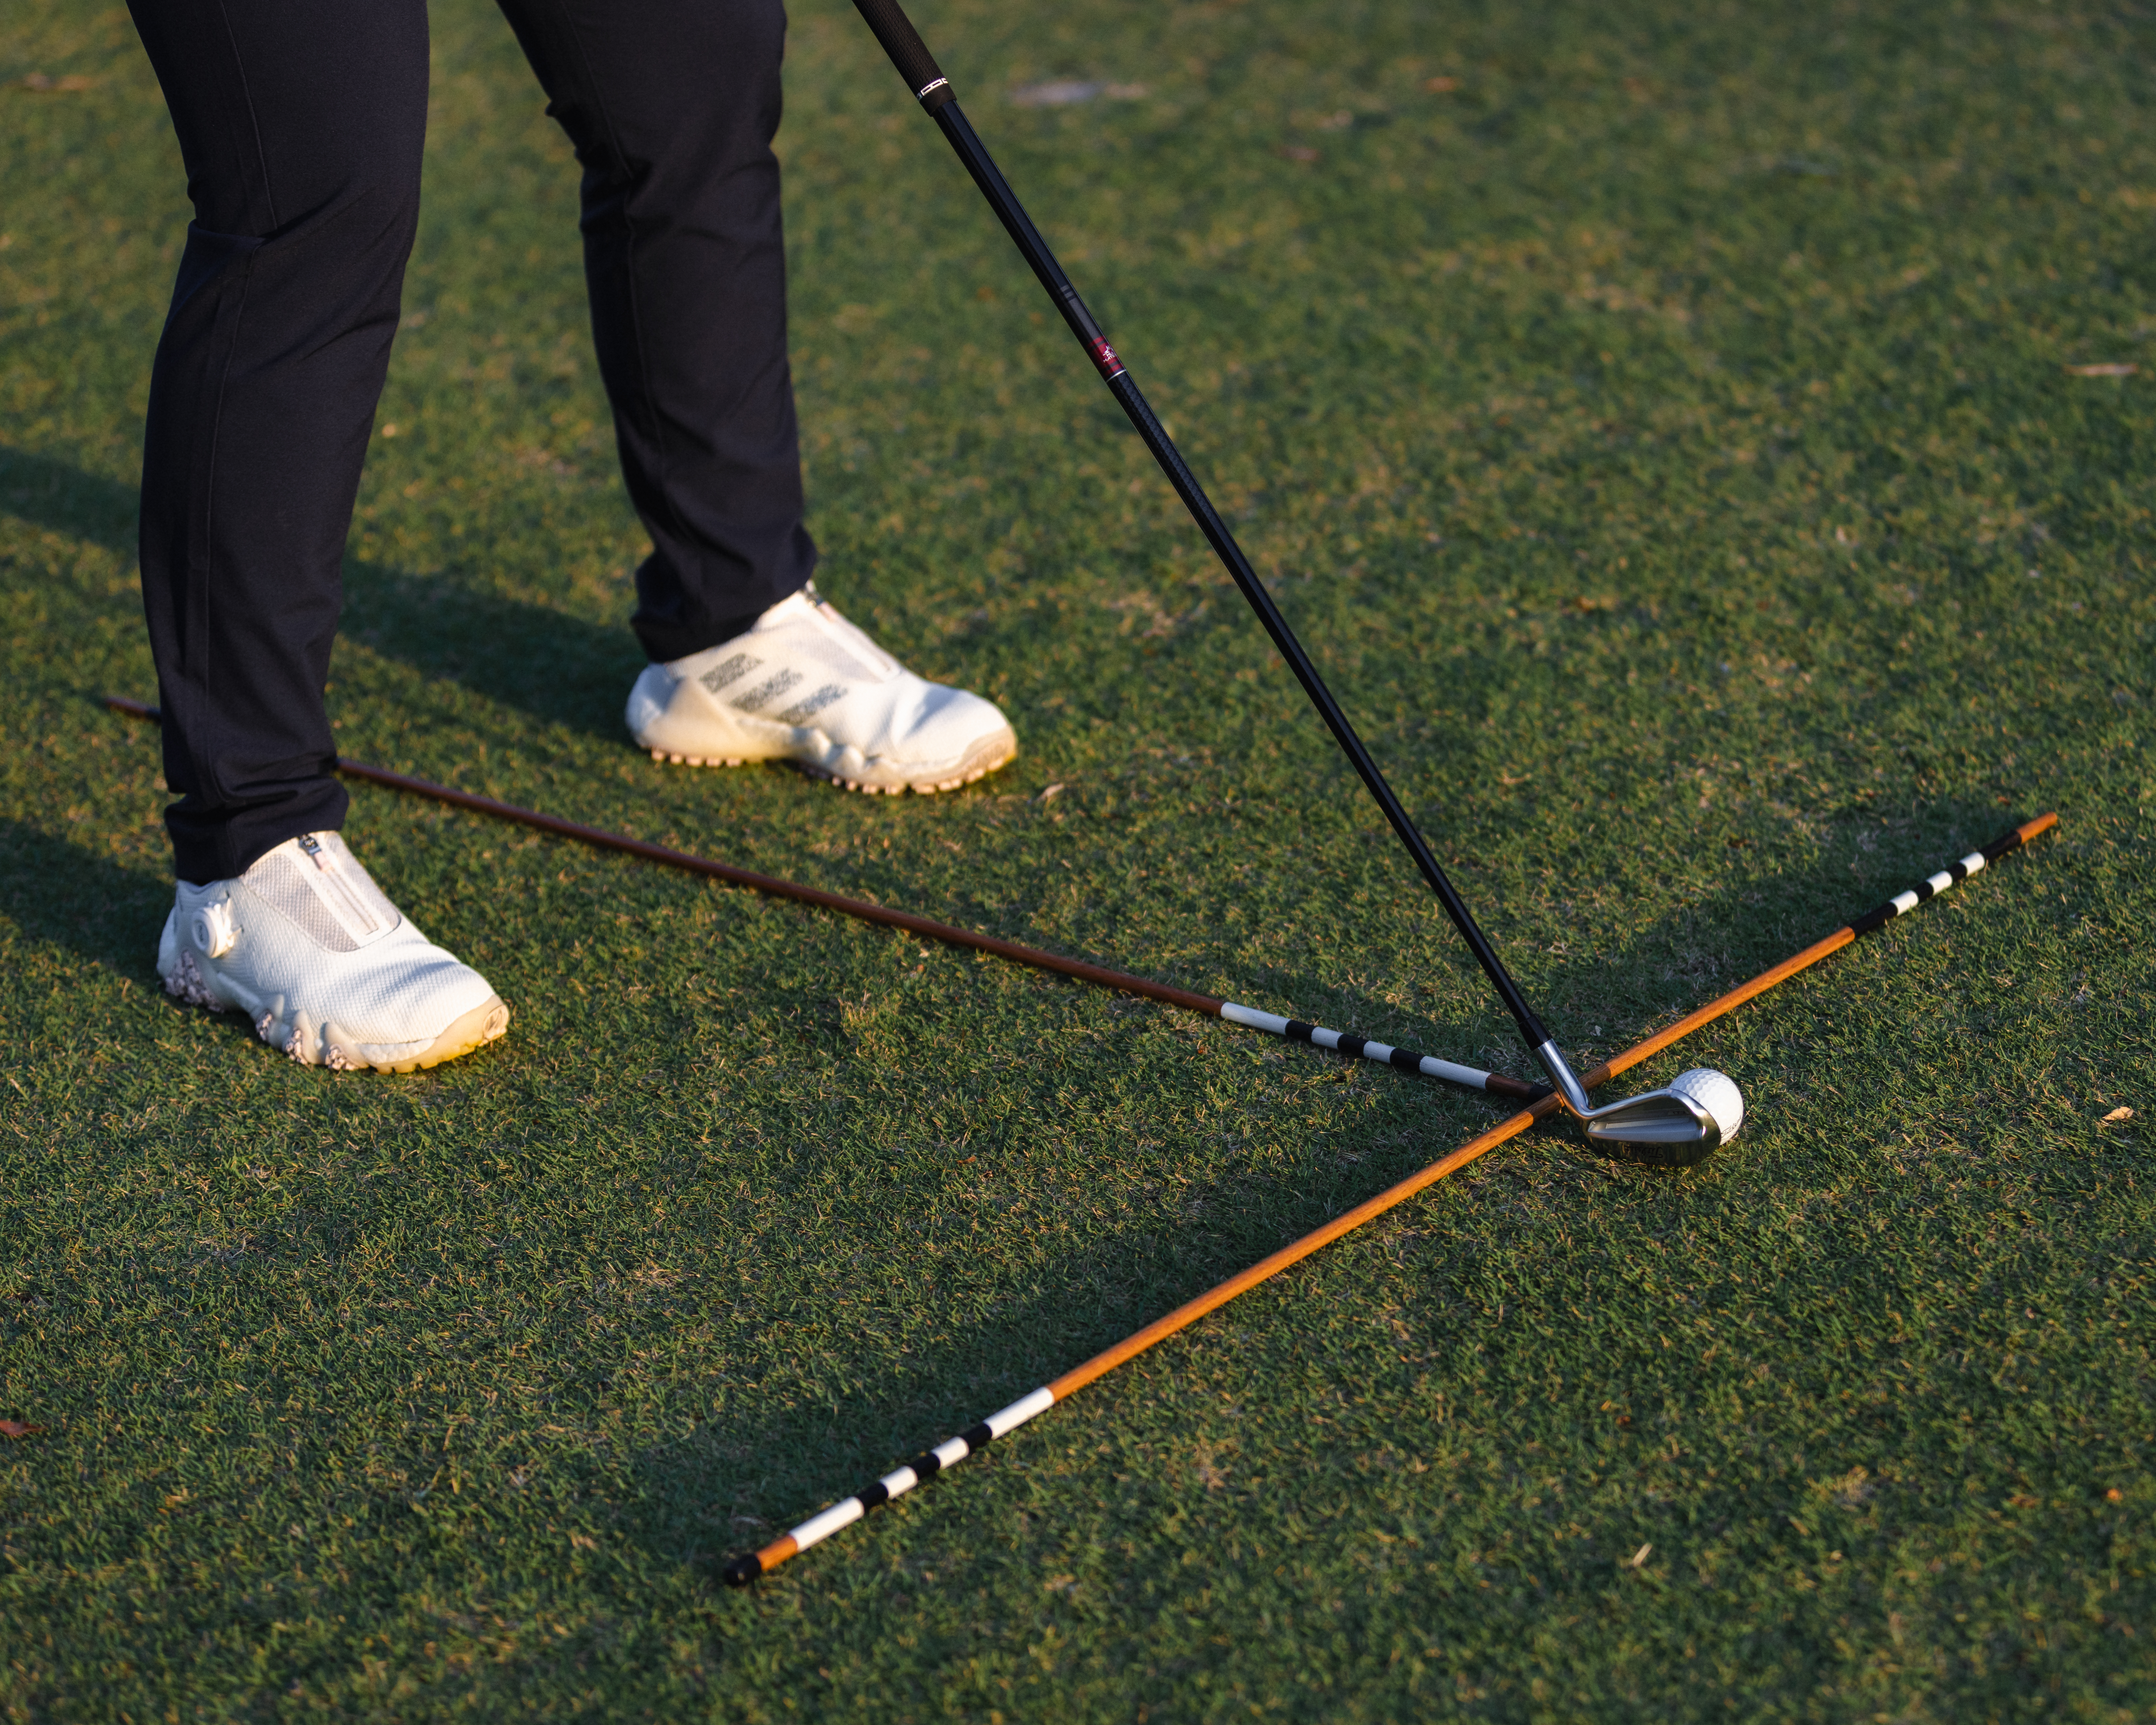
On the other hand, when using an iron, it's best to position the ball slightly further back in your stance than you would with a driver.
Placing the ball just ahead of the middle will accommodate the slimmer design of irons and promote smooth turf interaction for a more
pristine strike. You will notice with an iron, most of the metal on the back of the club aligns with the third to fourth groove. This
section is your ‘sweet spot’. This ball position allows for a descending impact on the golf ball, striking within the sweet spot zone,
resulting in accuracy, control and a satisfying amount of air time.


Balance is key in connecting all of the elements of your swing, starting from your initial setup and flowing through to the conclusion of your swing - you want to maintain balance until the end. This allows you to optimise power and help transfer your weight properly which will lead to a stable club face and an accurate club path for a perfectly controlled strike.
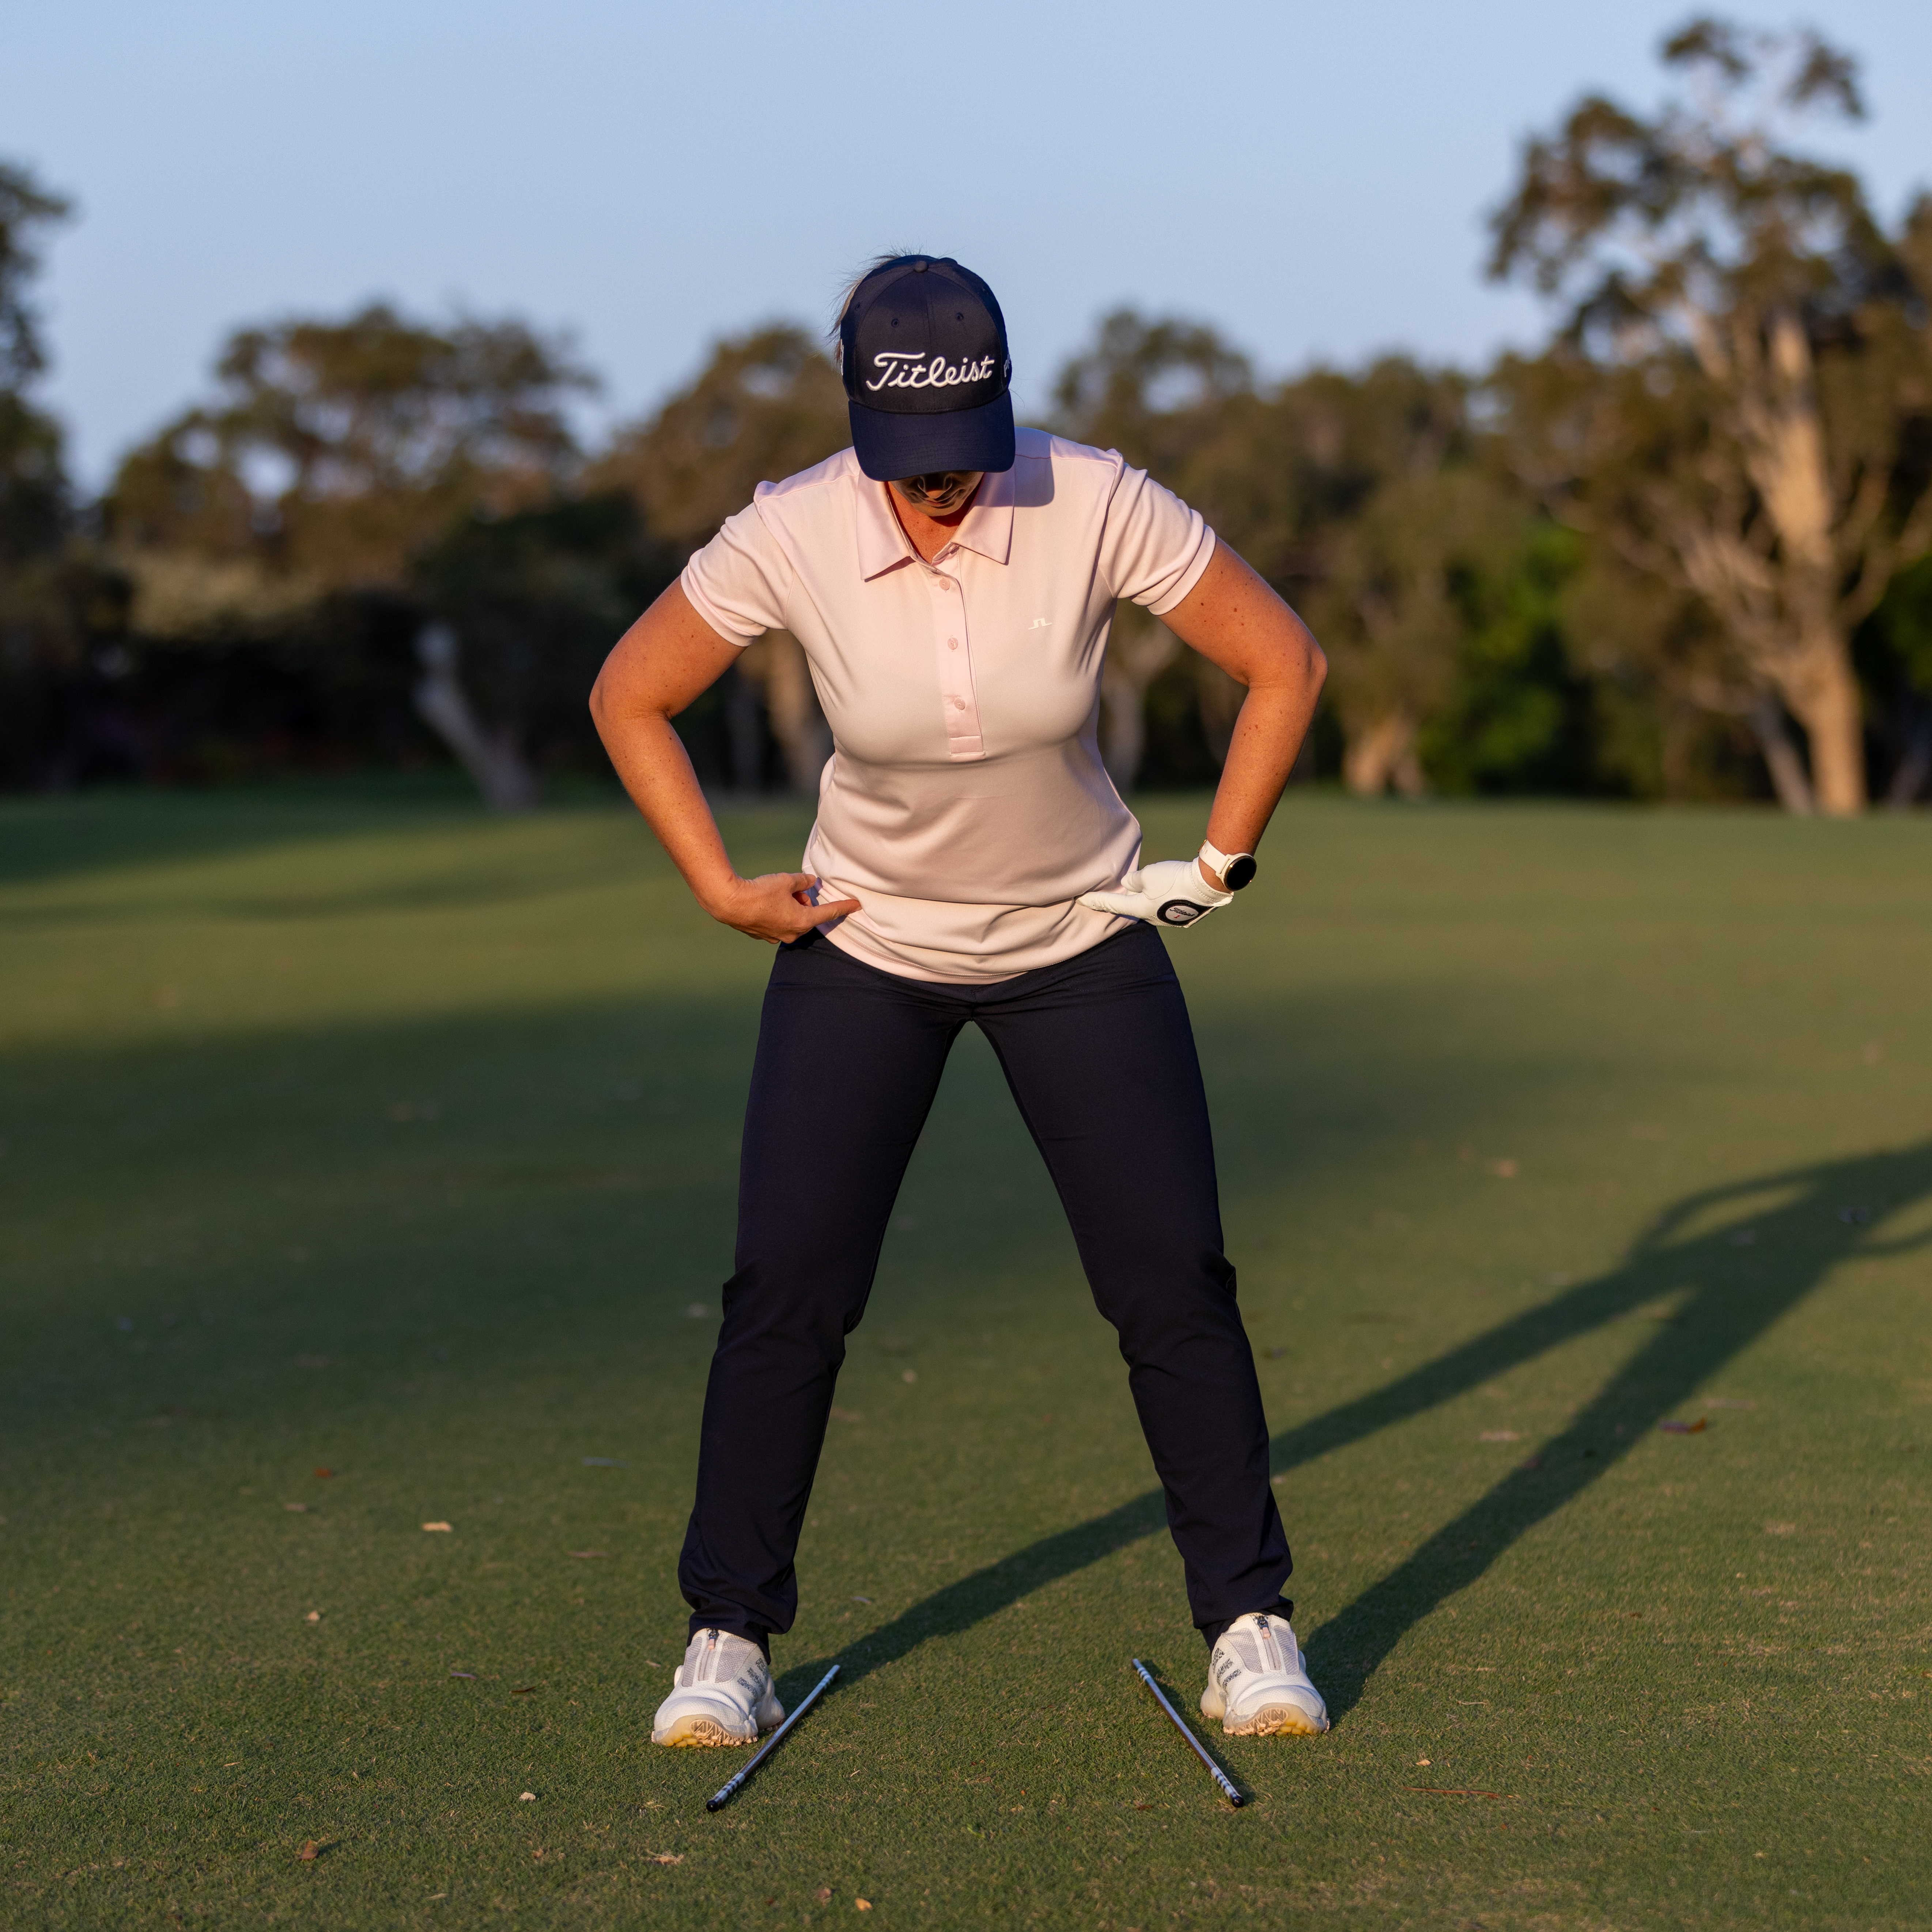
The driver is the longest club in the bag, so to be balanced we need to ensure our feet are wide enough, so we can accumulate speed and have control of the club face through the whole swing. As a rule, you can only swing as fast as you can decelerate, so if you are not balanced, you’re limiting your potential for speed, power, and accuracy.
So how do you find the ideal foot width? We want to use our hips – they are the central hub connecting our body. Grab two alignment sticks and align them with your hip bones on the ground. For the driver, step your feet outside the sticks, making them wider than your hips. With irons, it's fine to keep them around hip width. You want to picture yourself to be like a tree, grounded by roots to stay steady in the wind.


After setting the foot width, the next step is “connection”. For your driver or irons, start with a 50/50 weight distribution – both side to side and front to back through your feet. Spread your toes, like tree roots, for complete connection with the ground and full-body engagement. This balanced foundation becomes especially valuable when confronted with uneven lies, like hillsides or downslopes, and allows us to achieve the best contact possible with the golf ball.
.jpg)
Incorrect balance - weight on heals
.jpg)
Incorrect balance - weight on toes
.jpg)
Correct balance - weight in middle 50/50
.jpg)
Incorrect balance
.jpg)
Incorrect balance
.jpg)
Correct balance
With a great stance and your weight properly distributed, we now want to maintain balance through the swing. As you swing, feel your weight shift naturally as you rotate. Some pressure will move to your back foot but avoid swaying too much or lifting your heels. This sets you up for a strong downswing, but remember, transitioning smoothly is vital to maintaining balance and having the best possible contact with the golf ball. During the downswing and impact, shift your weight back to your front foot. Picture your hips leading the turn toward the target, followed by your upper body. This step-by-step movement, from weight shift to hip rotation, gives you the power and control for accurate shots.
To practice this, try the "pause and play" drill. Start your swing as usual but pause at the top of your backswing. Take a moment
to check your balance – you should feel stable and controlled. Then, initiate your downswing while maintaining this sense of balance and
hold your follow-through for an exaggerated two seconds. This drill helps prevent rushing and promotes a more controlled and accurate
motion.
Words by Katelyn Must
.jpeg)
|
Katelyn Must is a certified PGA and WPGA Teaching Professional. She is available for online or in-person golf coaching. Bookings &
inquiries are best directed via her website https://www.katelynmust.com/ Follow Katelyn on Instagram here and connect with her on Facebook here |